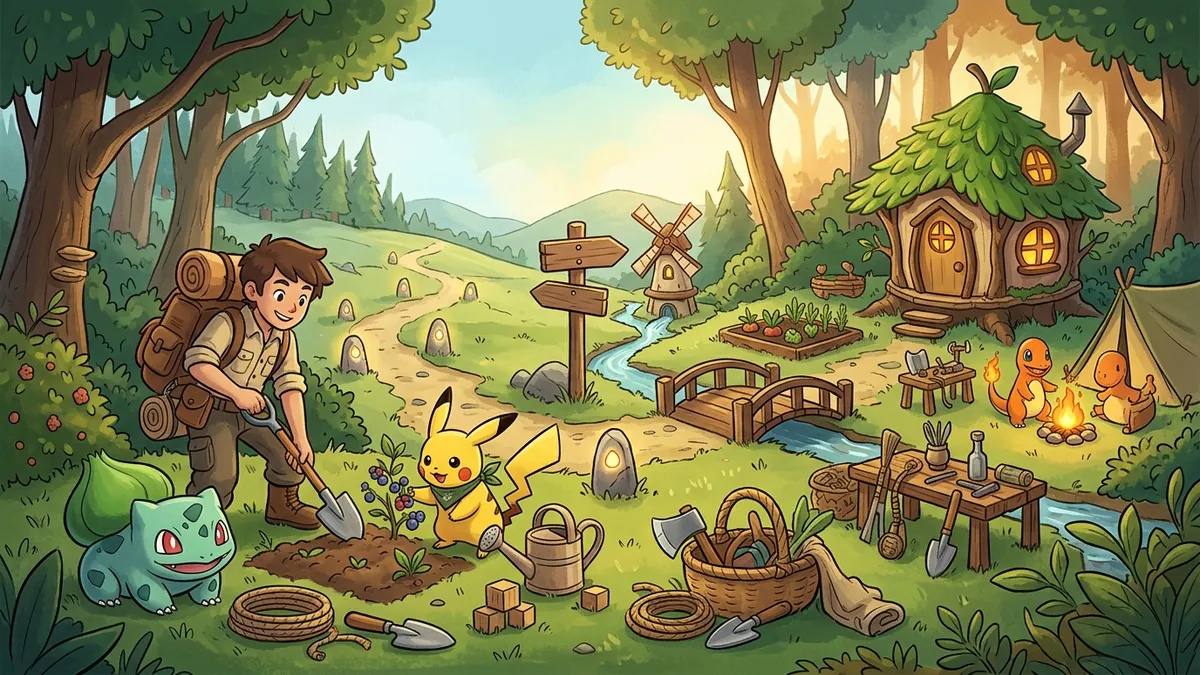
Comfort Level is the hidden engine behind progression in Pokemon Pokopia. Every Pokemon on your island has one, it directly feeds into your Environment Level, and it determines how strong a Pokemon’s Specialty is when it follows you around. A Bulbasaur at maximum comfort grows crops significantly faster than the same Bulbasaur at the lowest tier. The difference is not subtle.
Yet the game barely explains how comfort works beyond the initial tutorial prompt. There are four tiers, five environmental factors, and dozens of furniture items that may or may not matter depending on which Pokemon you are trying to please. This guide covers every detail: what the tiers mean, how temperature and humidity actually work, which furniture each Pokemon type prefers, and the house versus habitat decision that trips up most players.
The 4 Comfort Level Tiers Explained
Every Pokemon in Pokopia starts at Comfort Tier 1 when it first moves into your area. From there, meeting its environmental needs pushes it up through four tiers.
| Tier | Name | Requirements | Environment Level Contribution |
|---|---|---|---|
| Tier 1 | Uneasy | Pokemon has moved in (default) | Low (1x multiplier) |
| Tier 2 | Settled | 2 of 5 preference categories met | Medium (2x multiplier) |
| Tier 3 | Content | 4 of 5 preference categories met | High (3.5x multiplier) |
| Tier 4 | Blissful | All 5 preference categories met + bonus condition | Maximum (5x multiplier) |
The five preference categories are: Furniture, Temperature, Humidity, Light, and Food. Each Pokemon has specific preferences within each category. Meeting a preference counts as “met” for that category. You do not need to be perfect — hitting the right range is enough.
The jump from Tier 1 to Tier 2 is easy and quick. Getting from Tier 2 to Tier 3 takes more effort. Reaching Tier 4 (Blissful) requires all five categories plus a bonus condition, which is usually either playing a mini-game with the Pokemon or completing one of its personal requests.
The Environment Level contribution matters enormously. A single Pokemon at Tier 4 contributes as much to your area’s Environment Level as five Pokemon at Tier 1. This is why our Environment Level guide emphasizes quality over quantity — fewer, happier Pokemon raise your score faster than many uncomfortable ones.
Furniture Preferences — What Each Pokemon Wants
Furniture is usually the first preference category players tackle because it is the most visible. Every Pokemon has 3-5 preferred furniture items. Placing those items in or near the Pokemon’s living space (house or habitat) counts toward meeting the Furniture preference.
How Furniture Matching Works
The game checks a radius around the Pokemon’s assigned bed or habitat marker. Any preferred furniture within that radius counts. The radius is approximately 8 tiles for houses (indoor) and 12 tiles for habitats (outdoor). You do not need every preferred item to satisfy the category — placing at least 2 of the 3-5 preferred items is enough to mark Furniture as “met.”
Generic furniture (items not on the Pokemon’s preference list) gives a tiny comfort boost but does not count toward meeting the preference. Only specifically preferred items matter for tier progression.
Furniture Preferences by Pokemon Type
While each individual Pokemon has unique preferences, there are strong patterns based on typing that help you furnish efficiently.
| Pokemon Type | Commonly Preferred Furniture | Notes |
|---|---|---|
| Fire | Fireplace, Lava Lamp, Brick Oven, Torch Sconce | Heating items double as furniture + temperature |
| Water | Fountain, Aquarium, Water Basin, Shell Decor | Water features boost humidity simultaneously |
| Grass | Potted Plant, Flower Vase, Moss Carpet, Vine Trellis | Living plant items preferred over manufactured |
| Electric | Tesla Lamp, Circuit Board Decor, Battery Shelf | Light-producing items count toward Light preference too |
| Rock/Ground | Stone Table, Boulder Seat, Crystal Display, Sand Pit | Prefer raw/natural materials over polished |
| Ice | Ice Sculpture, Frost Mirror, Snowglobe, Cool Fan | Cooling items overlap with temperature needs |
| Normal | Plush Bed, Bookshelf, Cushion Chair, Picture Frame | Most flexible — accepts a wide range |
| Psychic | Crystal Ball, Star Map, Meditation Mat, Incense Burner | Unique items, mostly crafted from rare materials |
| Ghost | Candle Set, Old Clock, Cobweb Curtain, Haunted Mirror | Dark-themed items, some found in ruins |
| Flying | Perch Stand, Wind Chime, Feather Wreath, Sky Painting | Elevated items preferred, especially perches |
| Bug | Mushroom Stool, Leaf Bed, Honeycomb Shelf, Bark Panel | Natural, organic furniture items |
| Dragon | Trophy Stand, Gemstone Display, Flame Brazier, Scale Tapestry | Rare and expensive furniture requirements |
To check a specific Pokemon’s exact preferences, press A near it and select “Check Comfort.” The preference screen shows icons for each preferred furniture item, grayed out if you have not placed it yet and lit up if it is within range.
For a complete catalog of craftable furniture, see our furniture catalog guide.
Temperature — How Heating and Cooling Work
Temperature is one of the most misunderstood comfort factors. Every area in Pokopia has a base temperature that changes with the in-game season and time of day. Pokemon have a preferred temperature range, and you need to adjust their living space to fall within that range.
Temperature Ranges
The game uses a simplified temperature scale from 1 (freezing) to 10 (scorching).
| Range | Description | Typical Regions |
|---|---|---|
| 1-2 | Freezing | Frozen Peak (winter), Crystal Shores (night) |
| 3-4 | Cool | Frozen Peak (summer), Verdant Meadow (winter) |
| 5-6 | Mild | Verdant Meadow, Galebrook (most seasons) |
| 7-8 | Warm | Amber Ridge, Crystal Shores (daytime) |
| 9-10 | Hot | Scorched Desert, near lava sources |
Pokemon Temperature Preferences
Each Pokemon has a preferred range of 2-3 points on the scale. Fire-types generally prefer 7-10. Ice-types prefer 1-4. Water and Grass types usually sit in the 4-7 range. Normal types are flexible, accepting 4-8.
How to Adjust Temperature
Indoor rooms (houses) can be temperature-controlled with specific items:
Heating items (raise temperature by 1-3 points each):
- Fireplace (+3)
- Lava Lamp (+2)
- Torch Sconce (+1)
- Brick Oven (+2)
- Flame Brazier (+3)
Cooling items (lower temperature by 1-3 points each):
- Cool Fan (-2)
- Ice Block (-3)
- Frost Mirror (-1)
- Open Window (placed as a block gap) (-1)
- Water Basin (-1)
Effects stack. A room with a Fireplace (+3) and a Torch Sconce (+1) raises the base temperature by 4 points. If Verdant Meadow’s base temperature is 5 and your Fire-type Pokemon wants 8-10, placing a Fireplace and a Lava Lamp gets you to 10 — right in range.
Outdoor habitats are harder to temperature-control because items have reduced effect (-50% outdoors). This is one major reason to move Pokemon into houses for maximum comfort.
Humidity and Light — The Often Overlooked Factors
These two categories are simpler than temperature but still matter for reaching Tier 3 and Tier 4.
Humidity
Humidity is measured on a 1-5 scale. Water sources (fountains, aquariums, water basins) increase humidity. Dry items (sand, fire, heated rooms) decrease it. Most Water-type and Grass-type Pokemon prefer high humidity (4-5). Fire-type and Rock-type Pokemon prefer low humidity (1-2).
Items that raise humidity:
- Fountain (+2)
- Aquarium (+2)
- Water Basin (+1)
- Potted Plant (+1)
- Mist Machine (+3)
Items that lower humidity:
- Fireplace (-1)
- Sand Pit (-1)
- Dehumidifier (-2)
- Open Window (-1)
Indoor rooms start at the region’s base humidity. Verdant Meadow is naturally humid (3), while Amber Ridge is dry (1). Plan accordingly — a Water-type Pokemon in Amber Ridge needs extra water features to hit its preferred humidity.
Light
Light is measured as Dark, Dim, Normal, or Bright. Each Pokemon prefers one level. Ghost and Dark types want Dark or Dim. Most other types want Normal or Bright.
Items that add light:
- Window (crafted block) — lets natural daylight in
- Tesla Lamp — bright constant light
- Candle Set — dim light
- Crystal Display — moderate glow
- Lava Lamp — warm dim light
- Torch Sconce — moderate light
A room with no windows and no light sources is Dark. Add one Candle Set and it becomes Dim. Add a Tesla Lamp and it jumps to Bright. You control the exact level by choosing which and how many light sources to place.
For Ghost-type Pokemon that want darkness, build windowless rooms and skip light-producing furniture entirely. A room with only a Candle Set stays at Dim, which most Ghost-types accept.
Food Preferences — Flavor-Based Comfort
Every Pokemon has a preferred food flavor. The five flavors in Pokopia are: Bitter, Spicy, Sweet, Sour, and Salty. Feeding a Pokemon its preferred flavor once per day satisfies the Food preference category. Feeding it a non-preferred flavor gives a smaller comfort bump but does not count the category as “met.”
| Pokemon Type | Common Flavor Preference |
|---|---|
| Fire | Spicy |
| Water | Salty |
| Grass | Bitter |
| Electric | Sour |
| Normal | Sweet |
| Ice | Sweet or Sour |
| Rock/Ground | Salty |
| Psychic | Bitter |
| Ghost | Bitter or Spicy |
| Dragon | Spicy |
| Flying | Sweet |
| Bug | Sour |
| Fairy | Sweet |
| Fighting | Spicy or Salty |
| Poison | Bitter or Sour |
You can check a specific Pokemon’s preference on its comfort screen. Our cooking recipes guide and all recipes guide list the flavor of every dish, making it easy to cook targeted meals.
The most efficient approach is to cook a batch of each flavor and keep them in storage. When you do your daily feeding rounds, grab the right flavor for each Pokemon. This takes 5-10 minutes per in-game day and covers the Food preference for every Pokemon on your island.
House vs. Habitat — Which Is Better for Comfort?
This is one of the most important decisions in Pokopia and the answer is clear: houses are significantly better for comfort than habitats. Here is why.
Habitats (Outdoor Structures)
Habitats are the structures you build to attract wild Pokemon. They work perfectly for their intended purpose — drawing in new species. But for comfort optimization, they have serious limitations.
- Temperature control items work at 50% effectiveness outdoors
- No ceiling means Light cannot be controlled to Dark or Dim
- Humidity fluctuates with weather and seasons
- Furniture radius is larger (12 tiles) but items are exposed to elements
- Cannot achieve Tier 4 for most Pokemon types
Houses (Enclosed Indoor Rooms)
A house is any fully enclosed room — walls, floor, roof, and at least one door. When you assign a Pokemon to a house, it moves indoors and you gain full control over its environment.
- Temperature items work at 100% effectiveness
- Light is fully controllable from Dark to Bright
- Humidity stays stable regardless of weather
- Furniture radius is 8 tiles, but items are protected and more effective
- Can achieve Tier 4 for every Pokemon
How to Move a Pokemon Into a House
- Build an enclosed room. It needs walls, a floor, a roof, and a door. Minimum 2x2 interior space (4 floor tiles), but 3x3 or 4x4 gives you more furniture room.
- Place a bed inside. The bed is what the game uses as the “anchor point” for the Pokemon’s living space. Without a bed, the room is not recognized as a house.
- Open the Housing menu. Press the plus button and navigate to Housing. You will see a list of all befriended Pokemon and available rooms.
- Assign the Pokemon. Select the room, then select the Pokemon. It is now officially housed.
- Use honey to guide it in. The first time, use honey near the door to lead the Pokemon inside. After that, it moves in and out on its own.
Once a Pokemon is in a house, its old habitat spot frees up. You can use that habitat to attract a new Pokemon — effectively growing your population while keeping existing residents at higher comfort.
Comfort and Environment Level — The Connection
Comfort Level directly feeds into your area’s Environment Level, and the relationship is multiplicative rather than additive. Each comfort tier applies a multiplier to that Pokemon’s contribution.
A practical example: suppose your area has 10 Pokemon. If all 10 are at Tier 1 (1x multiplier each), your total comfort contribution is 10 points. If you upgrade 5 of those Pokemon to Tier 4 (5x each), those 5 alone contribute 25 points — more than double what all 10 contributed at Tier 1. The remaining 5 at Tier 1 add another 5, for 30 total. By focusing on quality comfort for fewer Pokemon, you tripled your score.
This is why the most efficient path to higher Environment Levels is not spamming habitats to attract dozens of Pokemon. It is getting a smaller number of Pokemon to Tier 3 or Tier 4. For the full breakdown of Environment Level mechanics, our Environment Level guide covers every factor in detail.
Mini-Games and Bonus Conditions for Tier 4
Reaching Tier 4 (Blissful) requires all five preference categories met plus a bonus condition. The bonus condition varies by Pokemon but falls into two types.
Mini-game completion. Most Pokemon require you to play a mini-game with them once per comfort reset. The available mini-games are:
- Jump Rope — Time your button presses to jump in sync
- Hide and Seek — Find the Pokemon hiding in your town within a time limit
- Quiz Time — Answer questions about the Pokemon’s type, preferences, and habitat
- Fetch — Throw a ball and the Pokemon brings it back (press A with good timing)
Each mini-game takes 1-2 minutes. Completing one counts the bonus condition as met for that Pokemon until the next comfort evaluation cycle (every 3 in-game days).
Personal request. Some Pokemon, especially rare and legendary ones, have a specific personal request instead of a mini-game. This might be placing a particular item in their room, introducing them to another Pokemon, or taking them to a specific location. These requests appear in your Important Requests log — our Important Requests walkthrough lists every personal request by Pokemon.
Tips for Maximizing Comfort Across Your Island
Here are practical strategies for keeping comfort high across all your Pokemon efficiently.
- Build multi-room houses. A single structure with separate rooms for different Pokemon types saves space and materials. Give Fire-types heated rooms on one side and Water-types humid rooms on the other.
- Batch your feeding. Cook all five flavors in bulk every few in-game days. Do a feeding circuit once per day — it takes minutes and satisfies the Food category for everyone.
- Prioritize high-value Pokemon. A rare Pokemon at Tier 4 contributes more to Environment Level than a common one. Focus comfort optimization on your rarest residents first.
- Reuse furniture. If you move a Pokemon to a different room, bring its preferred furniture along. Furniture is not consumed — pick it up and replace it.
- Check comfort screens regularly. The comfort screen tells you exactly which categories are met and which are not. A quick check every few days keeps you on track.
- Use dual-purpose items. A Fireplace counts as both furniture (preferred by Fire-types) and a heating item. An Aquarium is furniture and a humidity source. Choosing items that satisfy two categories at once saves space and effort.
FAQ
What are the 4 Comfort Level tiers in Pokopia? The four tiers are Uneasy (Tier 1), Settled (Tier 2), Content (Tier 3), and Blissful (Tier 4). Each tier requires meeting more of the Pokemon’s environmental preferences for furniture, temperature, humidity, light, and food.
How do I check a Pokemon’s comfort preferences in Pokopia? Press A near a befriended Pokemon and select Check Comfort, or open the Habitat Dex and select the Pokemon. Both show its preferred temperature range, humidity, light level, furniture items, and food flavors.
What is the difference between a house and a habitat in Pokopia? A habitat is an outdoor structure that attracts wild Pokemon. A house is an enclosed indoor room where a befriended Pokemon lives. Houses allow more comfort customization through furniture, temperature control, and lighting.
Does temperature affect Comfort Level in Pokopia? Yes. Each Pokemon has a preferred temperature range. Placing heating items (fireplaces, lava lamps) or cooling items (fans, ice blocks) near their living space adjusts the room temperature toward their preference.
How does furniture increase comfort in Pokopia? Each Pokemon has 3-5 preferred furniture items. Placing those items in or near their house increases Comfort Level. Generic furniture gives small boosts, but preferred items give large boosts.
How do I move a Pokemon from a habitat to a house? Build an enclosed room with a bed, assign it to the Pokemon through the Housing menu, and use honey to guide the Pokemon inside. Once it enters, it officially moves in and the habitat frees up.
Does comfort affect Pokemon Specialty strength? Yes. A Pokemon at Blissful (Tier 4) comfort has a 30% stronger Specialty effect compared to the same Pokemon at Uneasy (Tier 1). Higher comfort also increases the Specialty activation radius.
What is the fastest way to raise Comfort Level? Move the Pokemon into a house, place all its preferred furniture, set the room temperature to its ideal range, feed it preferred-flavor food daily, and play mini-games with it.