The Pokopia storage system seems simple on the surface — chests hold items, you find what you need, you move on. In practice, anyone past the 30-hour mark knows the truth: storage is the difference between playing the game and fighting the game. Every Pokemon, every recipe, every habitat unlock dumps more items into your bags, and without a categorized storage system, you end up with 8 chests of mystery clutter and a 4-minute hunt every time you need a single Crystal Shard.
This guide goes deeper than the basics. We break down every storage category in the game, how the auto-sort engine actually tags items, the exact chest layouts that work for each category, and when to consolidate or split as your inventory grows. If you have not built any chests yet, start with our storage organization guide which covers chest types and crafting costs. This article is the next step — what to put where, and why.
The 8 Core Storage Categories
Pokemon Pokopia tags every single item in the game with a hidden category. The game does not show you these tags directly, but they drive every auto-sort, smart filter, and search result. Understanding the 8 categories is the foundation of any serious storage system.
| Category | What It Includes | Example Items | Typical Count |
|---|---|---|---|
| Materials | Raw crafting inputs | Wood, Stone, Iron Ingot, Crystal Shard | 40 to 60 |
| Food | Edible items | Apples, Berries, Cooked meals, Snacks | 50 to 80 |
| Seeds | Plantable items | Vegetable seeds, Flower seeds, Tree saplings | 30 to 50 |
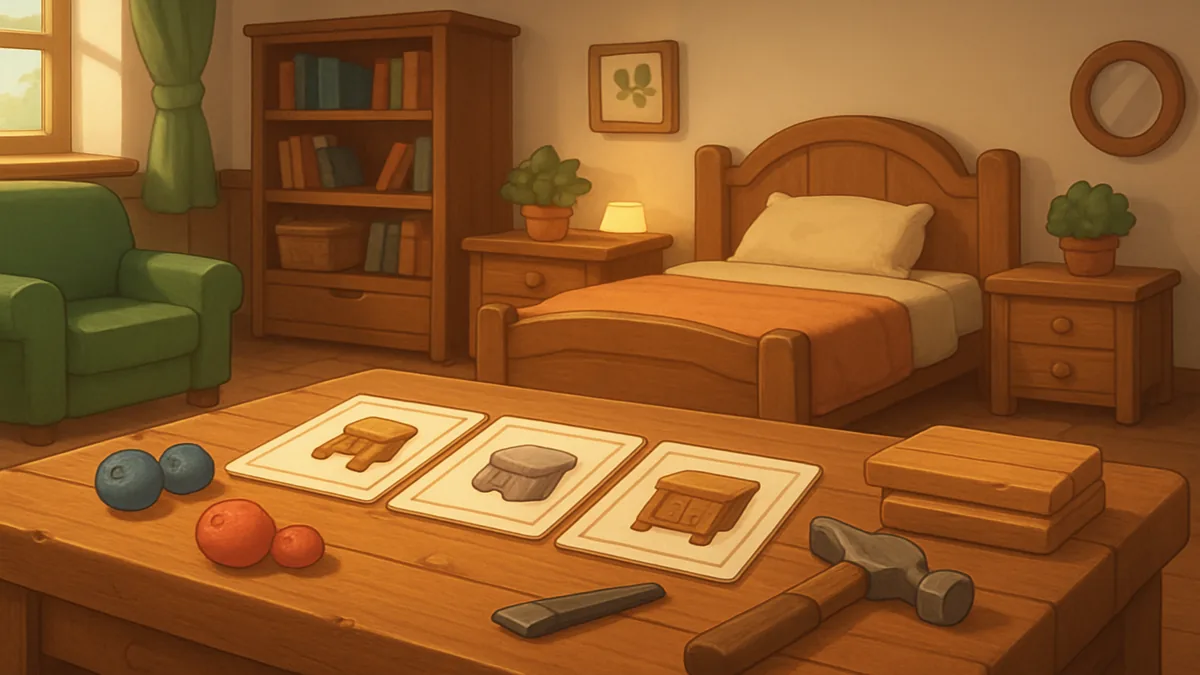
| Furniture | Placeable indoor items | Chairs, Tables, Beds, Lamps | 80 to 120 |
| Decorations | Outdoor placeables | Lanterns, Statues, Fences, Signs | 60 to 100 |
| Recipes | Recipe scrolls | Crafting recipes, Cooking recipes | 150 to 180 |
| Tools | Functional gear | Pickaxe, Watering Can, Net, Fishing Rod | 8 to 12 |
| Key Items | Story-locked uniques | Quest keys, Letters, Special Charms | 15 to 25 |
These counts represent a player at the postgame stage with most content unlocked. Early game, you might only have 10 to 15 items in each category. Your storage system should scale with these counts — a single 30-slot Basic Chest covers Materials at game start, but by the postgame you need at least an Iron Chest (60 slots) for Materials alone.
How Auto-Categorize Actually Works
Auto-categorize is the feature most players misunderstand. Here is what actually happens under the hood:
- Every item has a fixed category tag (set by the developers, not editable).
- When you place a Sorting Stone on top of a chest, it reads the category of every item inside.
- Items are grouped first by category, then alphabetized within each category.
- The visual display in the chest UI shows category headers separating each group.
The auto-sort runs every time you close the chest UI or place a new item. It is not a one-time action — the chest re-sorts continuously. This means you never need to manually organize a chest with auto-sort enabled. Throw items in randomly, close the chest, and they appear in clean category order next time you open it.
What auto-sort does NOT do:
- Move items between chests
- Reassign category tags
- Combine duplicate stacks across chests
- Filter out items below a minimum stack size
For those features, you need the upgraded Smart Sorting Stone (5 Stone + 2 Redstone + 1 Crystal Shard + 1 Star Fragment), which adds smart filters but still cannot move items between chests. Cross-chest movement is the one thing the system never automates — that is on you.
Recommended Chest Layout per Category
After testing dozens of chest configurations, these are the layouts that hold up across all play stages. The goal is to match chest size to category volume, not to use the biggest chest available everywhere.
Materials
- Recommended chest: Iron Chest (60 slots) or Crystal Vault for postgame
- Why: Materials are your highest-traffic category. You pull from this chest dozens of times per session.
- Placement: Within 3 tiles of every crafting station so the auto-link triggers.
- Sub-organization with Smart Sort: filter to Wood/Stone/Metal/Gem subcategories.
Food
- Recommended chest: Reinforced Chest (45 slots) early, Iron Chest (60) by mid-game
- Why: Food spoilage is faster outdoors, so the Reinforced Chest’s weatherproofing matters here.
- Placement: Inside the kitchen building, within 3 tiles of the cooking station.
- Sub-organization: separate raw ingredients from cooked meals using a second chest if needed. See our cooking recipes guide for which buffs each food provides.
Seeds
- Recommended chest: Basic Chest (30 slots) early, Reinforced Chest (45) by mid-game
- Why: Seeds are seasonal — you only access them during planting windows.
- Placement: Near your main farming plot, not in the home base. Reduces walking.
- Sub-organization: separate vegetable seeds, flower seeds, and tree saplings into 3 chests if you have the space. Cross-reference with our seeds and plants guide.
Furniture
- Recommended chest: Iron Chest (60 slots), eventually Crystal Vault
- Why: Furniture stacks 1 per slot, so you burn slots fast as your collection grows.
- Placement: Inside the home base near your crafting station.
- Sub-organization: split by room type — bedroom furniture, living room furniture, kitchen furniture. The furniture categories guide lists every subcategory.
Decorations
- Recommended chest: Reinforced Chest (45 slots) per outdoor zone
- Why: Decorations stack 1 per slot, and you redecorate seasonally.
- Placement: One per major outdoor zone (north, south, east, west) for fast access during seasonal swaps.
- Sub-organization: by season — spring chest, summer chest, autumn chest, winter chest if you go all-in on seasonal redecorating.
Recipes
- Recommended chest: Iron Chest (60 slots) by mid-game, Crystal Vault for postgame
- Why: Recipe scrolls accumulate to 150 to 180 items by endgame. Splitting them is wasteful because you rarely browse recipes once you have memorized your favorites.
- Placement: Anywhere — recipes are low-traffic. A back-room storage chest works fine.
- Sub-organization: not needed. Auto-sort handles recipe ordering well.
Tools
- Recommended chest: Basic Chest (30 slots)
- Why: Only 8 to 12 tools exist in the entire game. Anything bigger is wasted.
- Placement: Near the main exit of your home base so you grab tools on your way out.
- Sub-organization: not needed.
Key Items
- Recommended chest: Basic Chest (30 slots) — but most players keep these in personal inventory
- Why: Key items are story-critical and you rarely have more than 15 to 20 at any time.
- Placement: If you do chest them, keep it inside the home base for safety.
- Sub-organization: not needed.
Capacity Math by Category
Use this table to size your storage system based on your stage of the game:
| Stage | Total Items | Materials | Food | Seeds | Furniture | Decorations | Recipes | Tools | Key Items |
|---|---|---|---|---|---|---|---|---|---|
| Early game (0-20h) | 80-120 | 15 | 20 | 15 | 10 | 10 | 30 | 8 | 5 |
| Mid game (20-50h) | 200-300 | 30 | 40 | 25 | 50 | 40 | 80 | 10 | 12 |
| Late game (50-100h) | 350-500 | 50 | 60 | 35 | 90 | 80 | 140 | 11 | 18 |
| Postgame (100h+) | 500-700 | 60 | 80 | 50 | 120 | 100 | 180 | 12 | 25 |
Add 10 to 20% buffer to each category for stack overflow. Materials especially can stack to 99 per slot, but if you mass-harvest 3 different wood types you can still hit slot limits even with stacking.
Smart Filters and Search Shortcuts
The Smart Sorting Stone unlocks filter buttons inside any chest UI. The filters are:
- All (default)
- Materials only
- Food only
- Seeds only
- Furniture only
- Decorations only
- Recipes only
- Tools only
- Key Items only
- Custom (saves your last 3 filter combinations)
Filters do not move items — they hide categories you are not currently looking for. Combined with the search bar (press Search in any chest UI), you can find any item in roughly 5 seconds:
- Open the chest with the right category.
- Hit the relevant smart filter to hide everything else.
- Type the first 3 letters of the item name in search.
- Item glows yellow.
The biggest time-saver is the Custom filter slot. Most players use their Custom filter to combine “Materials + Food” because those are the two categories used during 80% of crafting and cooking sessions.
When to Consolidate vs Split Chests
The consolidate-vs-split decision comes down to traffic frequency. High-traffic categories deserve dedicated chests because every second spent searching adds up. Low-traffic categories can share a chest because you rarely need them under time pressure.
Use this decision rule:
- Split (dedicated chest per category): Materials, Seeds, Food, Furniture
- Consolidate (share a chest across categories): Recipes + Tools + Key Items
This gives you 5 main chests in your home base instead of 8, freeing 3 chest slots for backup capacity or themed redecoration storage. The split categories are the ones you touch hourly. The consolidated categories are the ones you touch weekly at most. See our crafting recipes complete list for a sense of how recipe-heavy your storage will get late game.
Late-Game Migration to Crystal Vault
The Crystal Vault is the largest chest in the game at 120 slots, and it costs 10 Crystal Shards, 5 Gold Ingots, and 3 Star Fragments to craft. The cost is steep but the benefit is real once you hit postgame: a single Crystal Vault replaces two Iron Chests for the same capacity.
Migration order (from highest impact to lowest):
- Materials — first migration. Materials are highest-traffic and benefit most from consolidation.
- Furniture — second migration. Furniture grows fastest and overflows Iron Chests by postgame.
- Recipes — third migration. Recipes are static so they migrate easily.
- Decorations — only if you go heavy on seasonal redecoration. Otherwise leave in Reinforced Chests.
Do not migrate Food, Seeds, Tools, or Key Items to Crystal Vault. Those categories never grow large enough to justify the crafting cost. The general rule: only migrate categories where your current chest is more than 80% full and growing.
Avoiding Storage System Mistakes
These are the storage mistakes that cost players the most time:
- No labels. Without Label Tags, you end up identifying chests by their contents instead of their name. Apply Label Tags from day one.
- Random placement. Putting chests wherever there is space breaks the 3-tile auto-link with crafting stations. Plan chest placement around stations, not around aesthetics.
- No backup chest. Always keep one empty Reinforced Chest in your home base. Inventory overflow during a long farming run will use it.
- Mixing categories. Throwing materials and food into the same chest defeats the purpose of auto-sort. Even with auto-sort, mixed chests are visually messy and slow to scan.
- Ignoring the search shortcut. Many players never learn the search button. Five seconds of muscle memory saves hours over a play career.
- Late chest crafting. Players often delay chest crafting because Iron Chests cost 10 Iron Ingots. The opportunity cost of a cluttered inventory is far higher than 10 Iron Ingots.
- No Smart Sorting Stone. Players stop at Sorting Stone because the basic version “works fine.” Smart Sorting Stone unlocks filters that quadruple browsing speed. Always upgrade.
FAQ
The frequently asked questions above cover the most common storage system questions. The single biggest takeaway from this guide is that storage in Pokemon Pokopia is a system, not a chore. Set it up correctly once, label everything, place chests near the right crafting stations, and the system runs itself for the rest of your playthrough. Players who treat storage as an afterthought spend hundreds of hours fighting their own inventory. Players who plan their storage system around the 8 categories spend that same time actually playing the game.